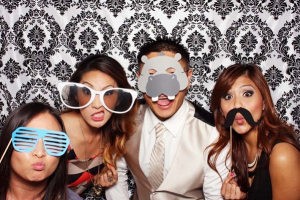
With Christmas a few weeks away, it is not surprising for people to start planning on parties and gatherings they would want to host. Photo booths have been popular add-ons to parties recently, and hiring them can range from a few hundred to a thousand dollars depending on the number of prints, the studio's brand, and the kind of set-up. But there is a way to set up a cheap and professional-quality photo booth with many components readily available at home or in a local hardware.
On a recent study, it was found out that between 2005 to 2012, "more people searched online for photo booth rentals than for wedding DJs." And there is no sign of the trend going down despite the popularity of Instagram and other online-based photo apps, and despite the service being on the expensive range.
A photo booth studio can range from $500 to 800 for 2 to 4 hours, and an open-air style can range from $600 to $850 for 2 to 4 hours. These packages offer 'unlimited' number of prints, but that is misleading as usually the cap is 100 prints and every print thereafter will be paid individually.
So how does one set up an affordable photo booth at home? Here is a no-frills guide:
Equipment needed:
- DSLR camera or smartphone
- Wireless or cable release stop
- Tripod
- Backdrop
- Photo booth design kits, that usually include cut-outs, hats and wigs
- Wireless or cable photo printer (optional)
- Photo prints (optional)
Installation and use:
1. Pick a quiet spot: Make sure the photo booth set-up is out of the way of the party. Usually the house's side entrance is a popular spot.
2. Set up the camera, tripod and release stop: Keep the tripod at an average mid-face height, and secure the DSLR camera or smartphone on the tripod. Set up the release stop and connect with the camera or smartphone. Tilt the camera or smartphone a bit higher so the flash is not directed on the guests. Directing the flash on guests can be annoying and can produce poor photos. Also the screen should face the guests if it is going to be a self-service photo booth. When using a DSLR camera, it is best to set it on manual exposure mode with shutter speed at 1/200 sec, aperture at f/8, and ISO 800. For smartphones, it is best to turn on the flash.
3. Set up photo printer (optional): Connect the wireless or cable photo printer with the DSLR camera or smartphone. Printing is optional.
4. Set up the backdrop: Put in place the backdrop and lay out the accessory kits.
5. Take test shots: Before opening the photo booth, test out a few shots to make sure the tripod and camera are properly set up.
6. Open photo booth: Once test shots are successful, photo booth can be opened to guests. Fire away!
An affordable option for photo booths is to post photos online; not to produce prints. The choice is up to the party host but either way, setting up a photo booth at home is way more affordable than hiring one.

