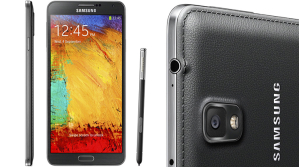
The XDA Android developer's forum strikes again with the recent addition of the Android 5.0 Lollipop operating system update available for the Samsung Galaxy Note 3.
Developers on the forum leaked the Android OS update as a downloadable firmware build, but only for model number SM-N9005 on the popular stylus-clad device.
The SM-N9005 model is the LTE version of the 5.7-inch phablet, meaning that it can be used with 3G and 4G wireless data networks, unlike the wi-fi-only models. The Galaxy Note 3 runs a quad-core Qualcomm Snapdragon 800 chip, 3 GB of RAM, and 16 GB of storage standard. It was first released in September 2013, but has been lauded as one of the greatest smartphones of that year with 10 million units sold in its first two months.
The 1.1 GB download not only includes the 5.0 Lollipop update, but also Samsung's own TouchWiz user interface that allows further design customization. Android 5.0 Lollipop is Google's latest major update to the Android operating system, bringing with it an improved user experience through a shiny new Material Design layout, notifications on the lock screen, and a more robust battery life.
The developer forum details the installation of the firmware quite well, but advises a few warnings that even advanced users should be aware of before installation: The installation is only meant for Galaxy Note 3 SM-N9005, all data stored in the handset must be properly backed up, the handset should have at least 80 percent battery power, USB drivers for the device must be installed on the computer, USB Debugging must be enabled, remember that any installed custom ROM and custom recovery will be lost after flashing the firmware, and the first boot following the installation will be significantly longer.
If all of that is in order, proceed at your own risk to the manual installation instructions included below:
- Download Odin v3.09.
- Extract Firmware zip file that you downloaded earlier from above link, you will get all necessary files that you required.
- Extract Odin zip file and you will get Odin3 v3.09.exe along with few other files.
- Power off your Android device. Wait 5-6 seconds for vibration to confirm complete switch off.
- Now, put the Galaxy Note 3 LTE SM-N9005 in Download Mode by pressing and holding down the Volume Down, Home button and the Power button together. A warning screen will come up; press Volume Up button to enter Download Mode.
- Now run Odin3 v3.09.exe (see Step 3) as an Administrator because Admin privileges is required to complete the process smoothly (only applicable Windows Vista and higher).
- Now connect your device to your PC using USB cable. An "Added!!" massage will appear in Odin's message box. If you don't get the same then you should try another USB port (try USB port located in back in your desktop PC). If that too don't work then you should reinstall the driver. If you successfully see the "Added!!" message in Odin then you are ready to go in next step. You should also see COM port with a number in Yellow if you successfully added your device.
- Click respective buttons and add files that you get in Step 2. Follow above Odin pic for help. Please note, don't use .pit file if your internal storage Is 16GB, it's 32GB. You can also check out this video to know how to flash it: http://youtu.be/-swC604J5As
- In Odin window, make sure only Auto Reboot, Re-Partition(only if you using PIT file) and F. Reset Time checkboxes are selected.
- Double check everything that we mentioned in Step 8 & Step 9 above. Now, once satisfied hit the START button to begin the flashing process.
- Once flashing completed, your Galaxy Note 3 LTE SM-N9005 will restart and soon you will see a PASS message with green background in the left-most box at the very top of the Odin. You can now unplug the USB cable to disconnect your device from computer.


